ปรับแต่ง ActionText ให้รองรับ Youtube Embeded
- actiontext
- javascript
- rails
- ruby
- stimulus
ปกติแล้วการใช้งาน ActionText รองรับการใส่ข้อมูลที่เป็น link อยู่แล้วตั้งแต่ต้น แต่ในกรณีที่เราอยากใส่ Embeded Link อย่างเช่น Youtube หรือ Vimeo เข้าไปและอยากให้มีการแสดงภาพตัวอย่างของวิดีโอปรากฏขึ้นในตัว editor หรือจะแสดง Video Player ขึ้นมาเมื่ออยู่ในหน้าแสดงผล เราจะต้องมีการเพิ่มเติมความสามารถให้กับ ActionText กันเล็กน้อย
 Link in ActionText
รูปแบบในการพัฒนา
- พัฒนาเฉพาะการเพิ่มลิงค์ด้วย Youtube Embedded เท่านั้น
- การจัดการเหตุการณ์ต่างๆ จะใช้ Stimulus
ขั้นตอนในการเพิ่ม Emedded Link
- สร้างปุ่ม Embed และเพิ่มเข้าไปยังเครื่องมือของ ActionText
export default class YoutubeEmbedded {
  extend (parent) {
    const buttonHTML =
    '<button type="button" class="trix-button" data-trix-attribute="embed" data-trix-action="embed" title="Embed" tabindex="-1">Youtube Embed</button>'
    const buttonGroup = parent.toolbarElement.querySelector(
      ".trix-button-group--text-tools"
    )
    const dialogHml =
      `<div class="trix-dialog trix-dialog--link" data-trix-dialog="embed" data-trix-dialog-attribute="embed">
        <div class="trix-dialog__link-fields">
          <input type="text" name="embed" class="trix-input trix-input--dialog" placeholder="Paste your youtube video url" aria-label="embed code" required="" data-trix-input="" disabled="disabled">
          <div class="trix-button-group">
            <input type="button" class="trix-button trix-button--dialog" data-trix-custom="add-embed" value="Add">
          </div>
        </div>
      </div>`
    const dialogGroup = parent.toolbarElement.querySelector(".trix-dialogs")
    buttonGroup.insertAdjacentHTML("beforeend", buttonHTML)
    dialogGroup.insertAdjacentHTML("beforeend", dialogHml)

    this.addEmbedEventListener()
  }

  addEmbedEventListener () {
    document
      .querySelector('[data-trix-action="embed"]')
      .addEventListener("click", event => {
        const dialog = document.querySelector('[data-trix-dialog="embed"]');
        const embedInput = document.querySelector('[name="embed"]');
        if (event.target.classList.contains("trix-active")) {
          event.target.classList.remove("trix-active");
          dialog.classList.remove("trix-active");
          delete dialog.dataset.trixActive;
          embedInput.setAttribute("disabled", "disabled");
        } else {
          event.target.classList.add("trix-active");
          dialog.classList.add("trix-active");
          dialog.dataset.trixActive = "";
          embedInput.removeAttribute("disabled");
          embedInput.focus();
        }
      })

    document
      .querySelector('[data-trix-custom="add-embed"]')
      .addEventListener("click", event => {
        document.dispatchEvent(new CustomEvent("add-embed", {
          bubbles: true,
          detail: { link: () => document.querySelector('[name="embed"]').value }
        }))
      })
  }
}
- สร้าง embed_controller.jsr เพื่อใช้ในการควบคุมจัดการเหตุการณ์ของ ActionText โดยเริ่มต้นจากการใส่ปุ่ม Embed ที่เราสร้างขึ้นมา
import { Controller } from "stimulus"
import Trix from 'trix'
import YoutubeEmbedded from 'embed'
export default class extends Controller {
  static targets = [ "field" ]

  connect () {
    this.editor = this.fieldTarget.editor;
    let embed = new YoutubeEmbedded()
    embed.extend(this.fieldTarget)
  }
}
- ใส่ Stimulus Controller เข้าไปใน rich text area ของ content
<div class="field">
  <%= form.label :content %>
  <%= form.rich_text_area :content, data: { controller: "embed", target: "embed.field" } %>
</div>
- รีเฟรชหน้าเว็บดูจะปรากฏปุ่ม Embed เพิ่มขึ้นมาดังแสดงในรูปด้านล่าง
 ปุ่ม Embed
- สร้างโมเดล Embed เพื่อใช้สำหรับเก็บข้อมูล Embeded Link ไว้ในฐานข้อมูล
$ rails generate model Embed link:string link_id:string
- เพิ่มเติมความสามารถให้กับโมเดล Embed โดยวัตถุที่ถูกแนบเข้ากับ ActionText จะต้องมี Signed Global ID (sgid) ซึ่งเราจะต้อง include โมดูล ActionText::Attachable เข้ากับโมเดล
app/models/embed.rb
class Embed < ApplicationRecord
  include ActionText::Attachable
end
- เพิ่มโค้ดใน embed_controller.js ในการจัดการเหตุการณ์ เมื่อมีการเพิ่มลิงค์ ซึ่งจะเห็นได้จากโค้ดในไฟล์ embed.js จะมีการส่งเหตุการณ์ที่ชื่อ
add-embedดังนั้นเราจะต้องaddEventListenerให้กับเหตุการณ์ดังกล่าว และส่งข้อมูลไปบันทึกไว้ที่ server
app/javascript/controllers/embed_controller.js
  document.addEventListener("add-embed", (event) => {
    let link = event.detail.link()
    if (link) {
      const token = document.querySelector('meta[name="csrf-token"]').content
      fetch('/embeds', {
        method: "POST",
        headers: {
          'Content-Type': 'application/json',
          'X-CSRF-Token': token
        },
        body: JSON.stringify({
          embeds: {
            link
          }
        })
      })
      .then(response => response.json())
      .then(({ sgid, content, contentType }) => {
        const attachment = new Trix.Attachment({
          content,
          sgid,
          contentType,
          filename: link,
          previewable: true
        })
        this.editor.insertAttachment(attachment)
        this.editor.insertLineBreak()
      })
    }
  })
- จะสังเกตเห็นว่าโค้ดข้างต้นมีการเรียก
POST /embedsดังนั้นในฝั่ง server เราจะต้องสร้าง endpoint สำหรับบันทึก Embed ไว้
app/controllers/embeds_controller.rb
  def create
    @embed = Embed.create(embed_params)
    respond_to do |format|
      format.json
    end
  end
- ส่งผลที่เป็น json กลับไปยัง client ด้วย JBuilder
app/views/embeds/create.json.jbuilder
json.extract! @embed, :link
json.sgid @embed.attachable_sgid
json.content render(partial: "embed/thumbnail", locals: { embed: @embed }, formats: [:html])
json.contentType "embed/youtube-video"
app/views/embeds/_thumbnail.html.erb
<%= image_tag "http://i3.ytimg.com/vi/#{embed.link_id}/maxresdefault.jpg", size: 300 %>
- เพิ่มการแสดงผลภาพตัวอย่าง เมื่อ ActionText ทำการโหลดเนื้อหากลับมาแสดงบน Editor โดยการเพิ่มฟังก์ชัน
to_trix_content_attachment_partial_pathเข้าไปยังโมเดล Embed
app/models/embed.rb
  def to_trix_content_attachment_partial_path
    'embed/thumbnail'
  end
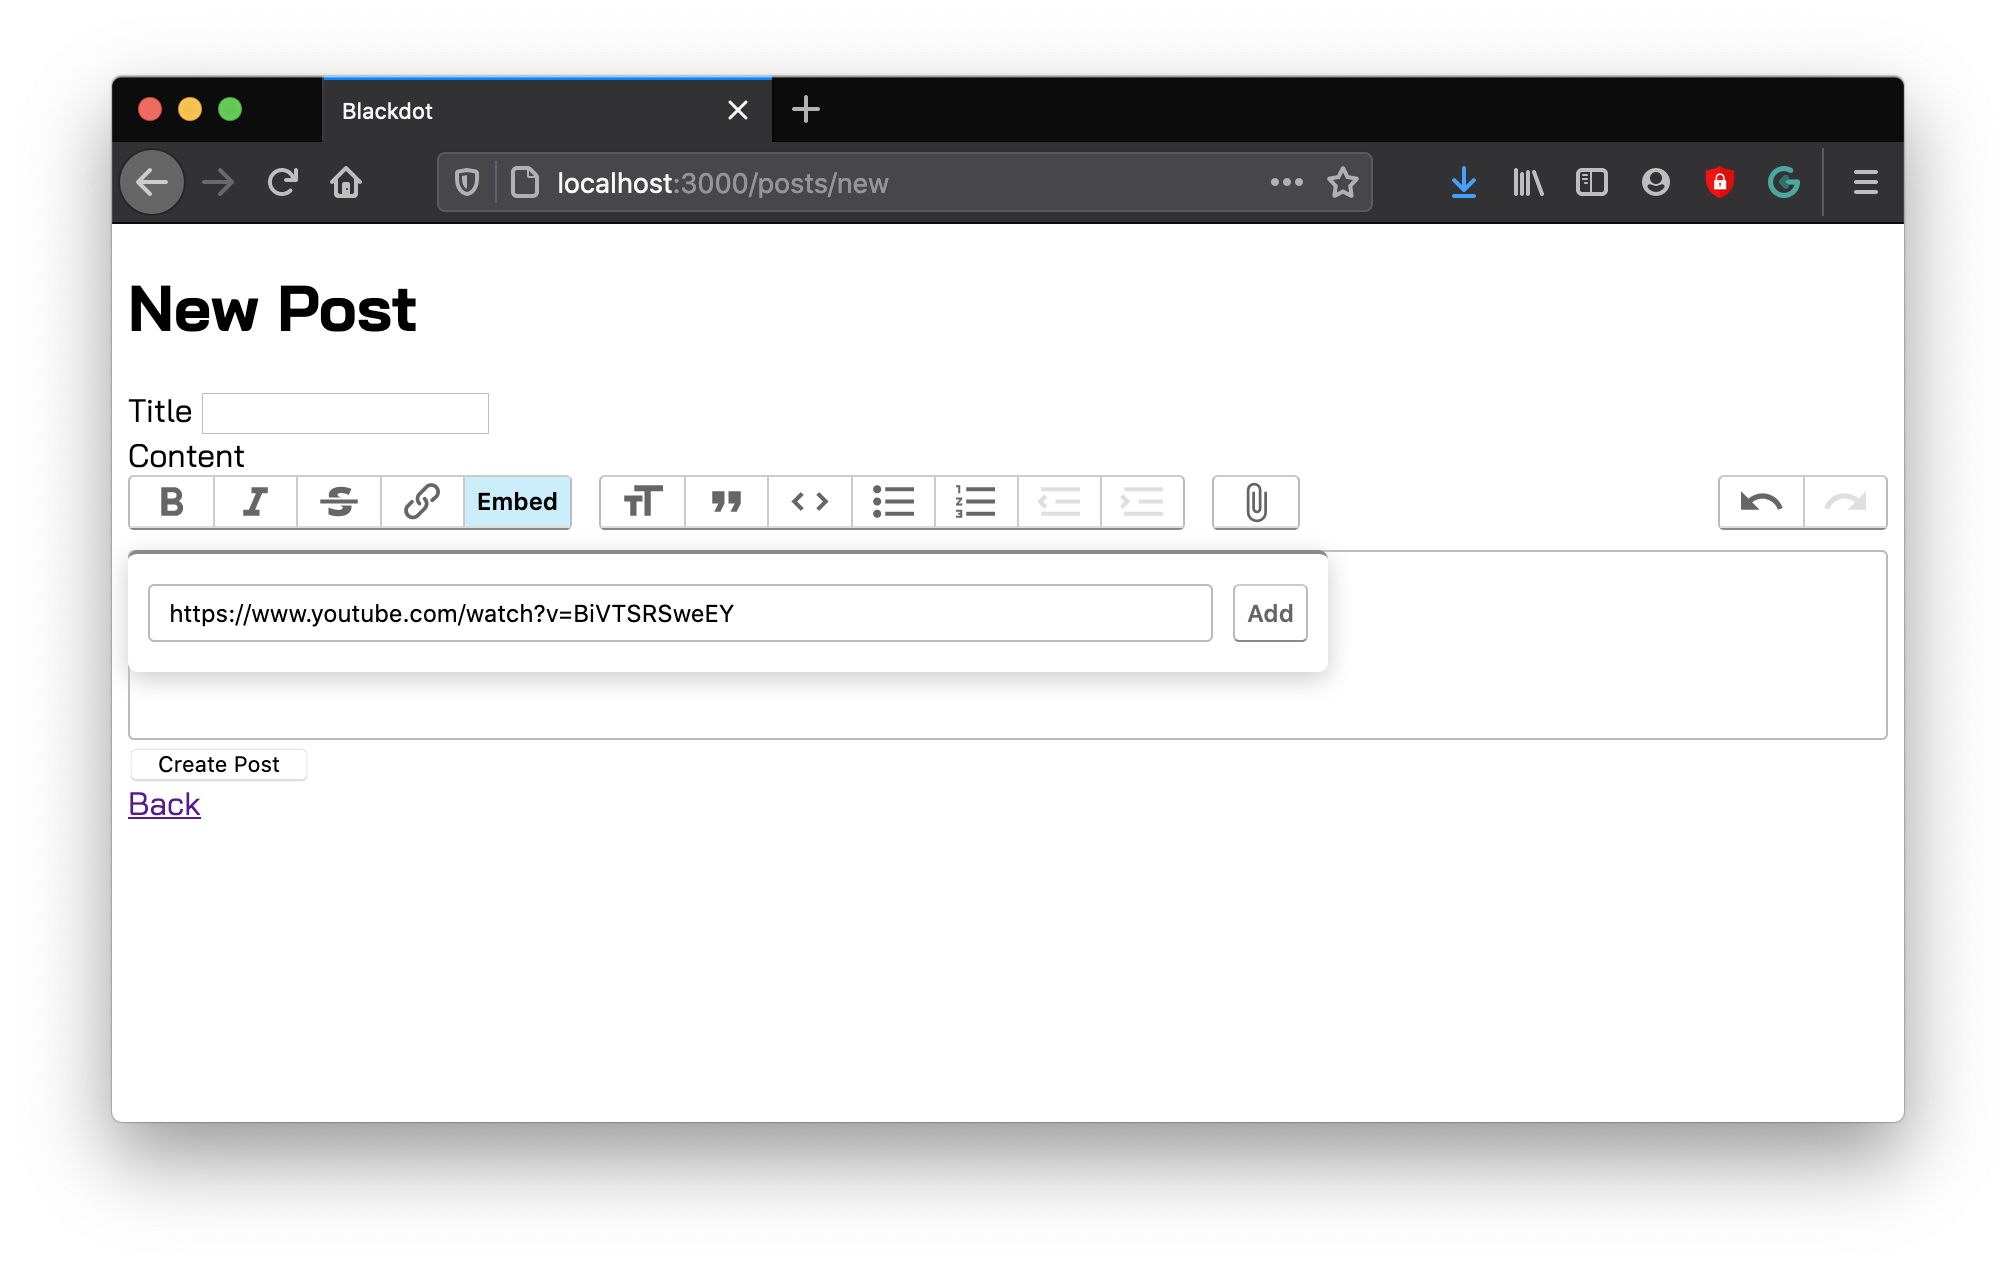
 ใส่ลิงค์ของ Youtube เข้าไป
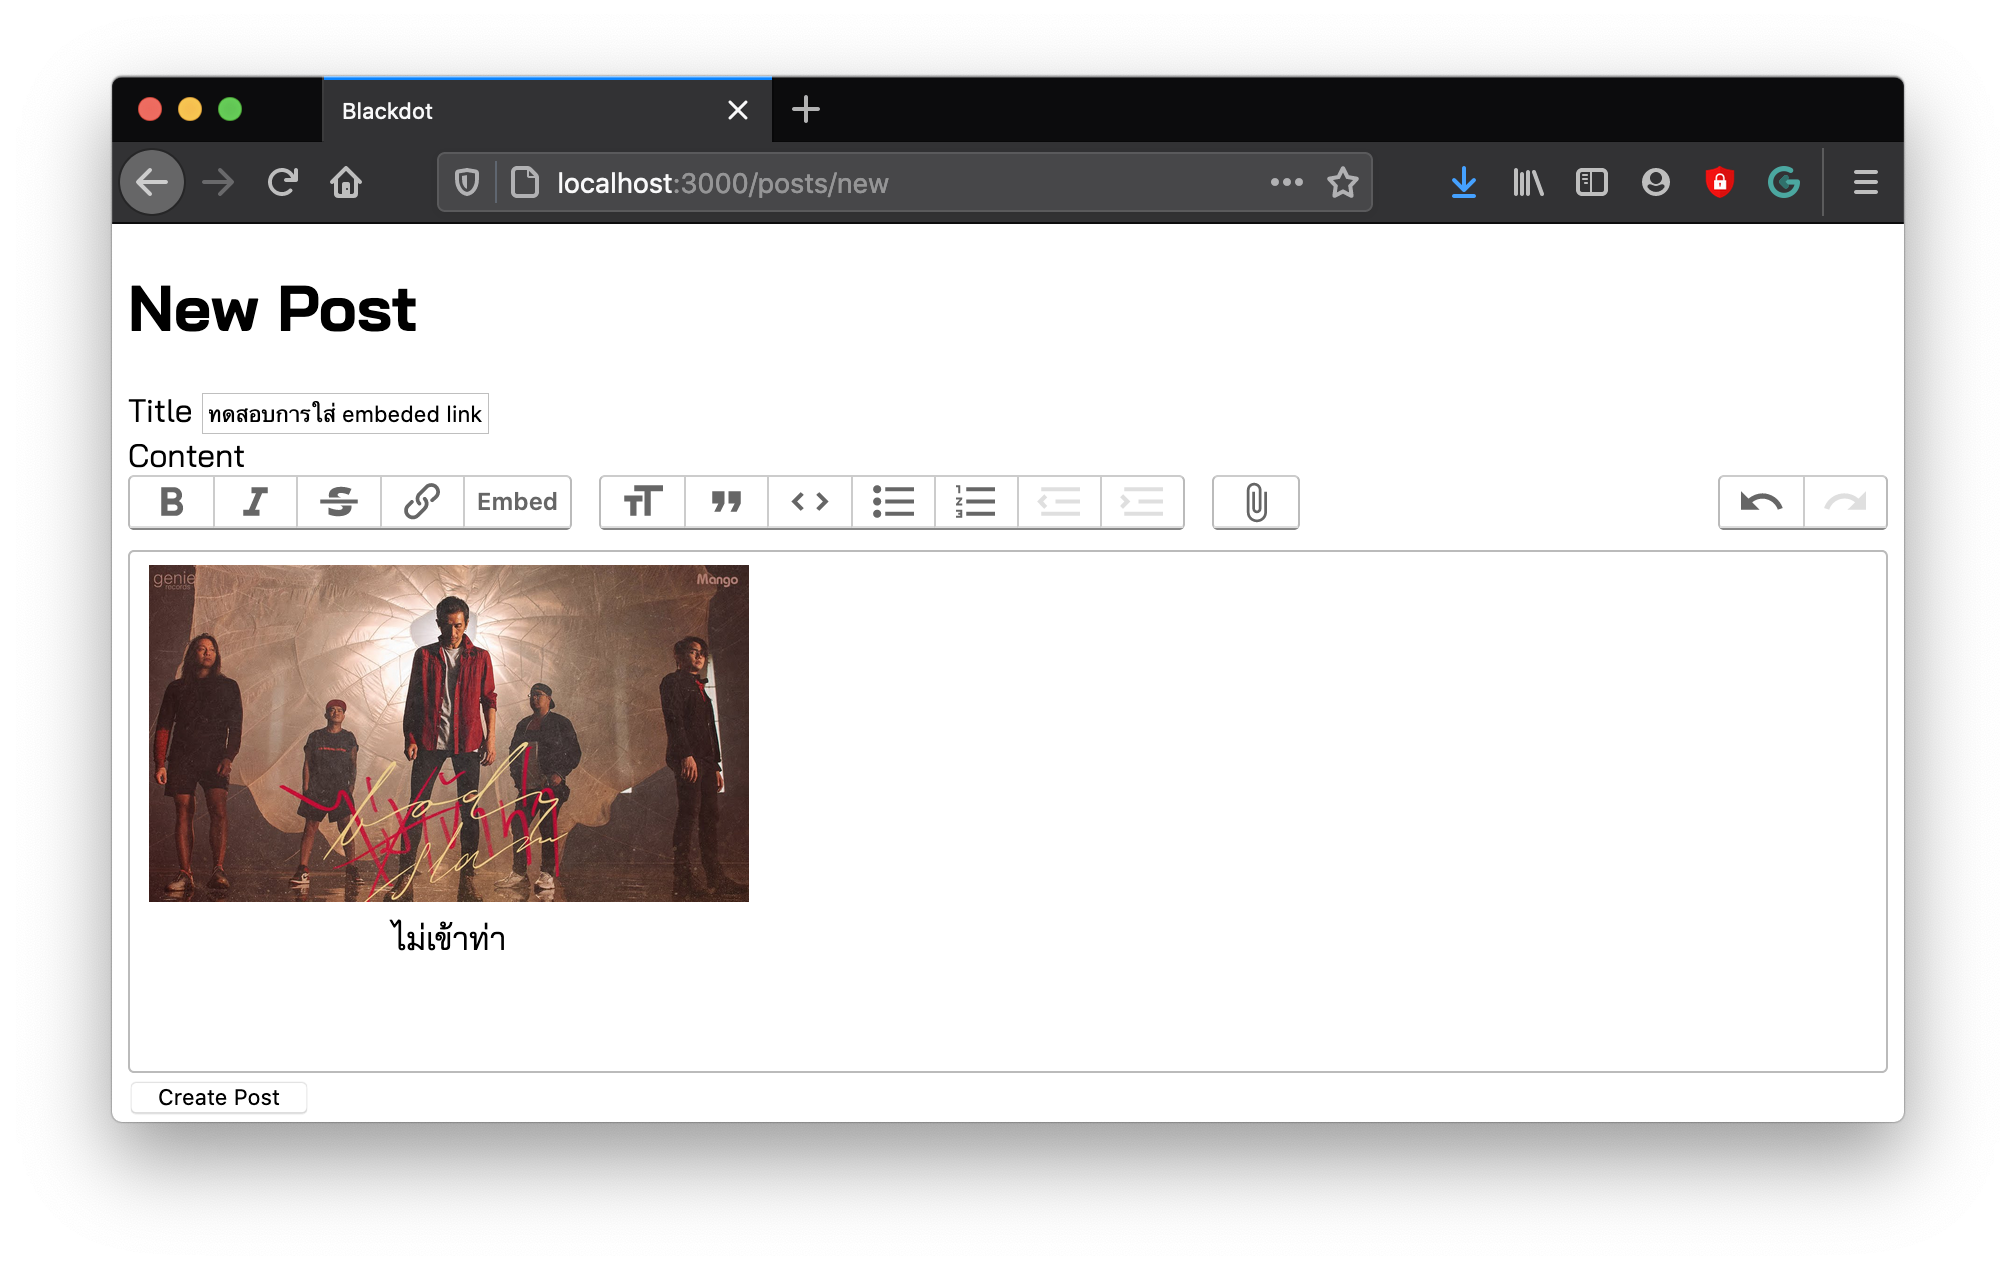
 แสดงภาพตัวอย่างของวิดีโอที่ใส่เข้าไป
- เปลี่ยนการแสดงผลเนื้อหาของ ActionText ให้แสดง Video Player ของ Youtube
app/views/embeds/_embed.html.erb
<div class="embed-responsive">
  <iframe width="640" height="360" src="https://www.youtube.com/embed/<%= embed.link_id %>" frameborder="0" allow="accelerometer; autoplay; encrypted-media; gyroscope; picture-in-picture" allowfullscreen></iframe>
</div>
- การแสดง Embedd Link ของ Youtube จะผ่านการเรียกใช้งาน iframe ซึ่งโดยปกติแล้ว ActionText จะไม่รองรับตั้งแต่ต้น ดังนั้นจะต้องกำหนดค่าเพิ่ม
config/application.rb
  config.to_prepare do
    ActionText::ContentHelper.allowed_tags << "iframe"
  end
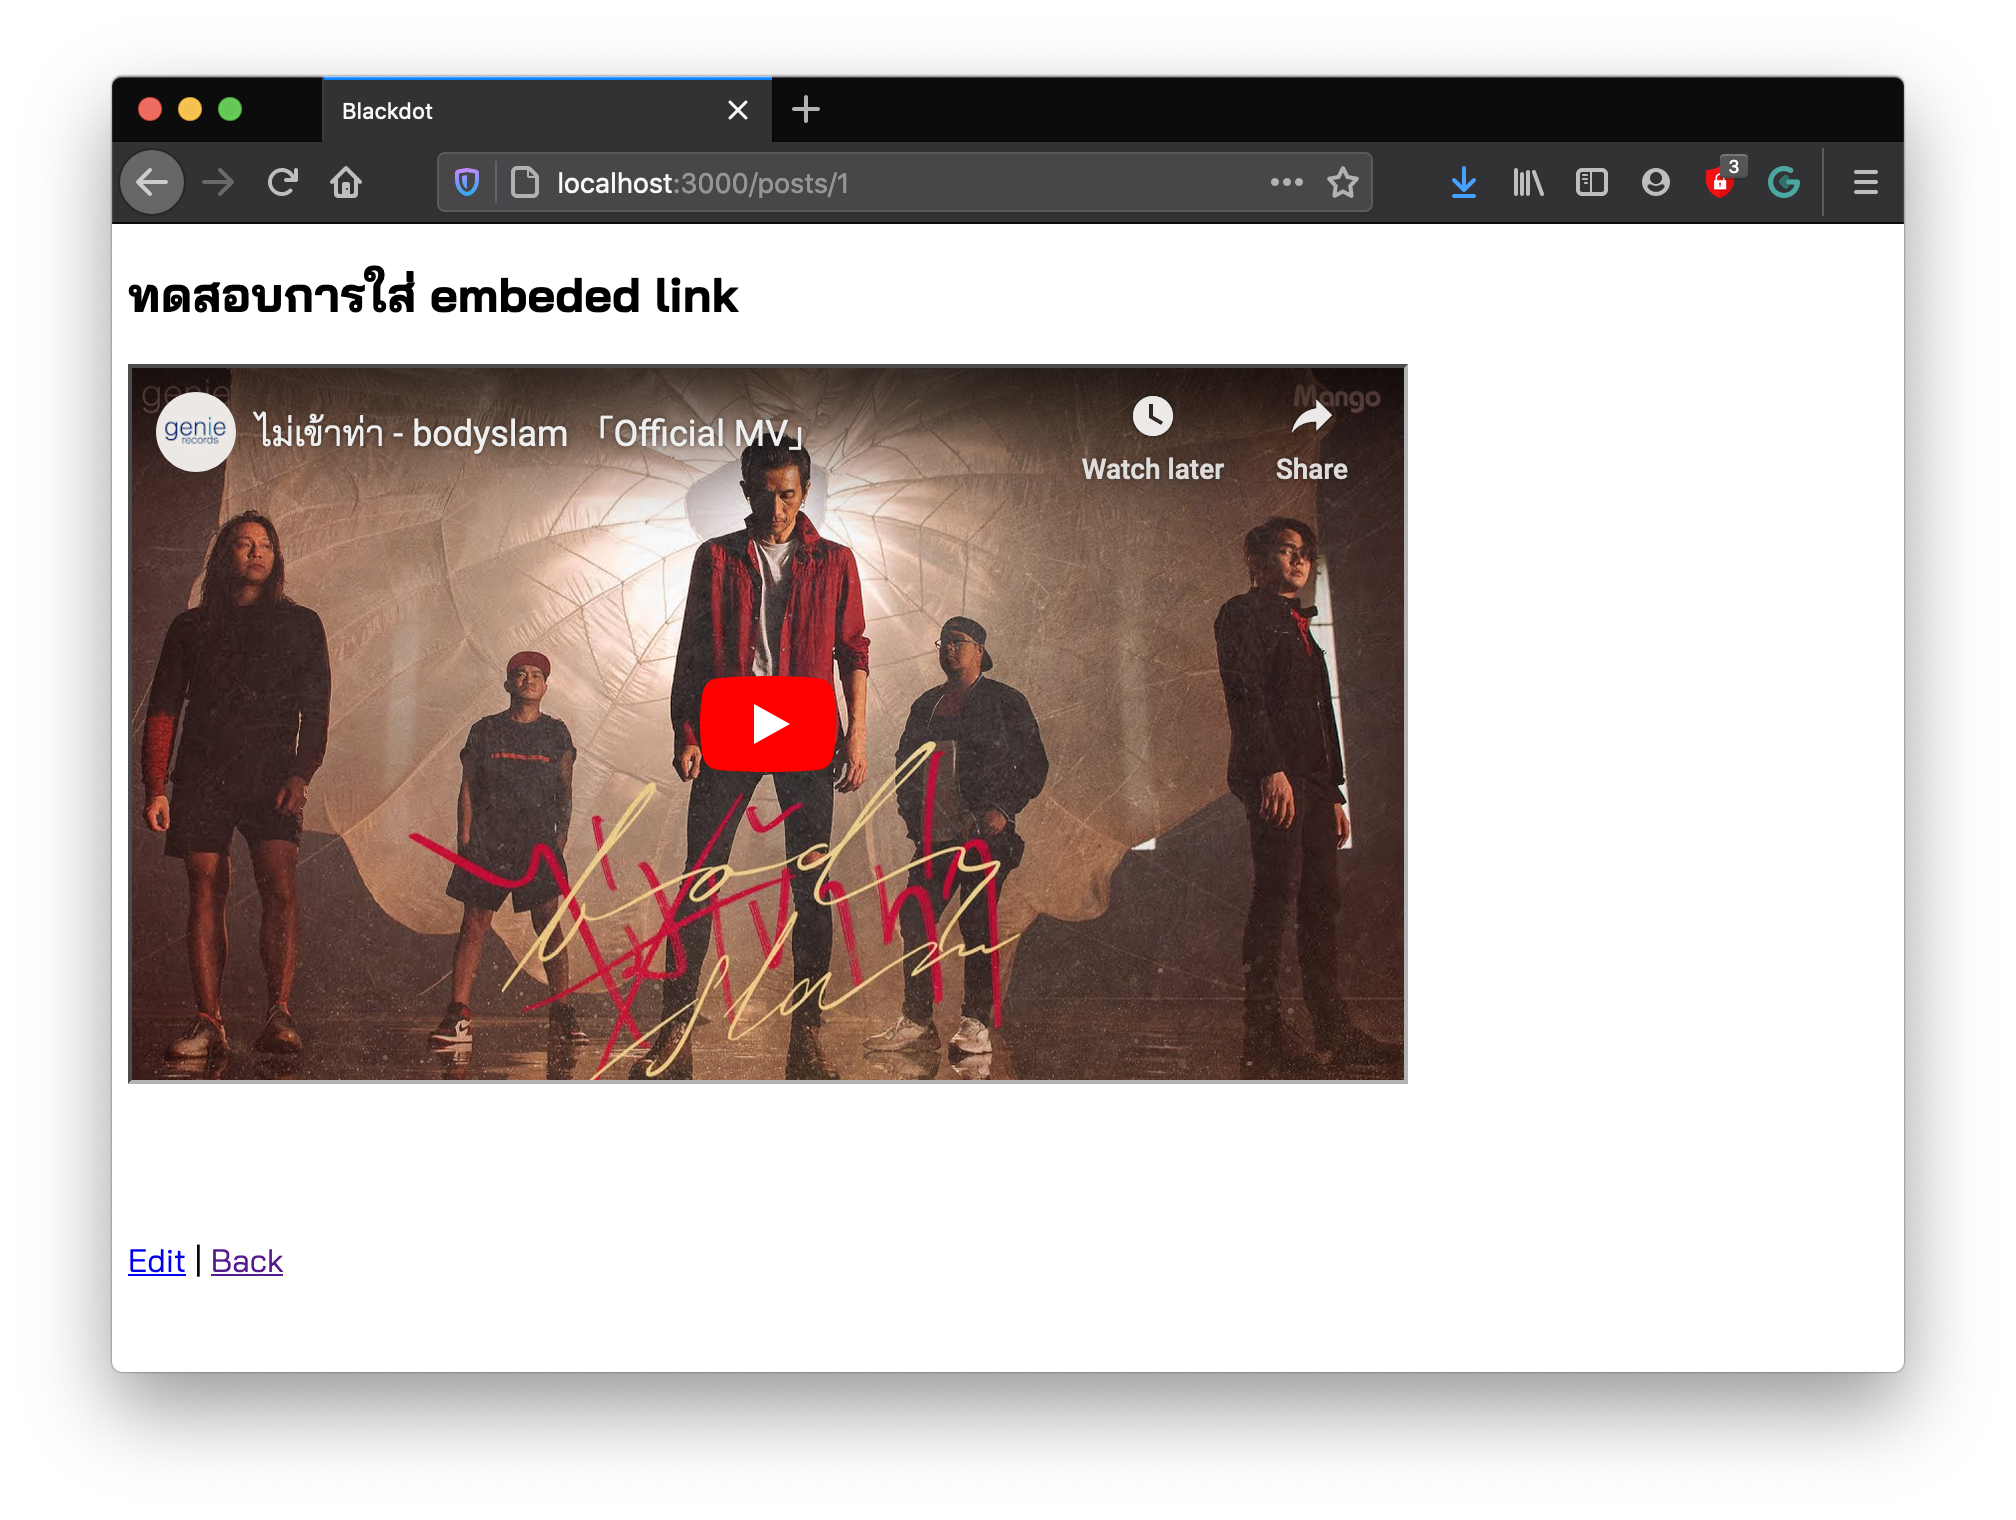
 แสดงวิดีโอ
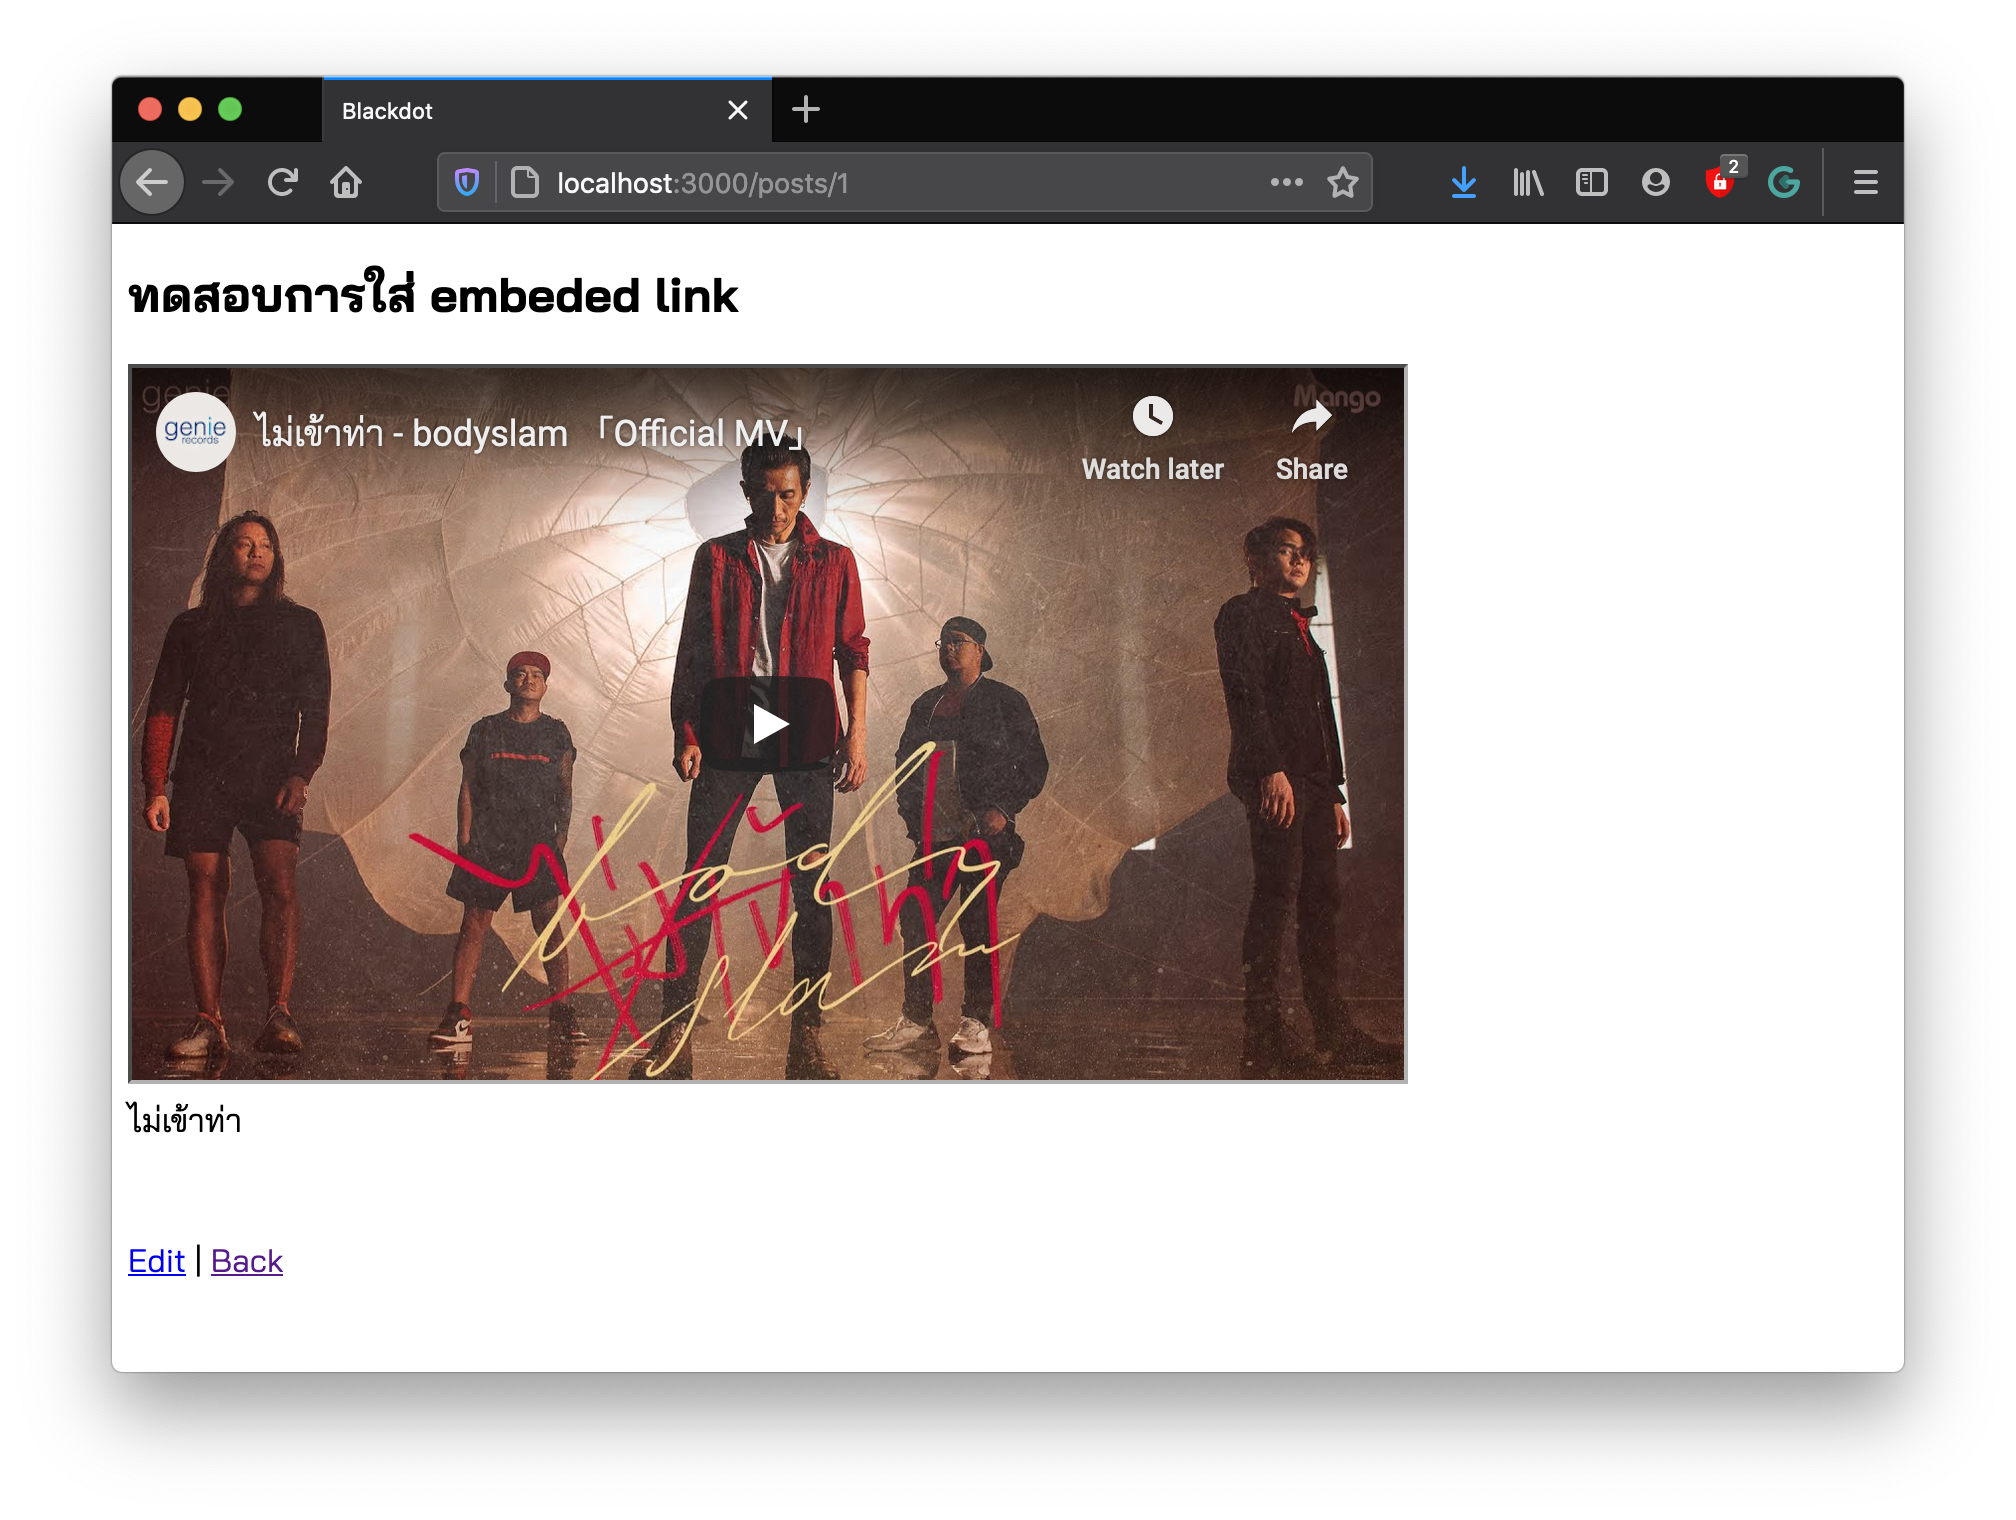
- เพิ่ม JavaScript อีกนิด เพื่อให้แสดง caption
app/javascript/packs/application.js
document.addEventListener("turbolinks:load", () => {
  let elements = document.querySelectorAll("action-text-attachment[content-type^=embed]")
  elements.forEach(element => {
    let caption = element.getAttribute('caption')
    if (caption != null)
      element.insertAdjacentHTML('beforeend', `<caption>${caption}</caption>`)
  })
})
 แสดงวิดีโอและ caption